Monday, July 25, 2016

Kiwi Coaster Pattern

Kiwi!

I can't think of an introduction to this post other than my boyfriend loves kiwi, and he eats it without peeling off the hairy skin. WTF right?? He says he eats the skin as well because it's nutritious, but I still don't understand how he manages to eat them without getting itchy or something. But we all have our own quirks right? So I don't judge him (I just occasionally make fun of him for that, which is all cool with him, or which he already got used to, hehe).

So this is my third coaster pattern, and it basically uses the same pattern as my watermelon and grapefruit coasters, but with different color changes and I think one less row as well. Hopefully next post I'll be doing the list of coaster patterns I made and used before. Next Monday, maybe? I'm thinking of posting stuff regularly, and so I'm currently deciding which day of the week is best - currently deciding between Monday and Tuesday - what do you guys think? :)

Anyway I said I won't be doing much introduction but I got derailed but now I'm back on track and here it is now, without further ado, the pattern!

Orange on kiwi! Not sure why I did this.


Materials
Hook: 4mm crochet hook
Yarns:
Gantsilyo Guru Light Cashmere Blend White
Gantsilyo Guru Milk Cotton Light Lime (green)
Creme de la Creme Fudge Brown
Some black yarn

Note: Again, I would recommend using the same type of yarn throughout the project, to get the same gauge and thickness and all that in all parts of the coaster.


Stitches Used
ch (chain)
dc (double crochet)
sc (single crochet)
sl st (slip stitch)
magic ring


Kiwi Coaster

Using white yarn, make a magic ring.

Row 1: ch 2, 12 dc in the ring. Join with a sl st to the first dc (12 sts).

Row 2: Change to green yarn. Ch 2, 2 dc in each st around. Join with a sl st to the first dc (24 sts).

Row 3: ch 2, *1 dc in next st, 2 dc in the next* repeat around 12 times. Join with a sl st to the first dc (36 sts).

Row 4: ch1, *1 sc in next 2 sts, 2 sc in the next* repeat around 12 times. Join with a sl st to the first sc (48 sts).

Row 5: Change to brown yarn. Ch 1, *1 sc in next 3 sts, 2 sc in the next* repeat around 12 times. Join with a sl st to the first sc (60 sts). Fasten off.

For the seeds, kiwi seeds aren't really that random, so what I did was on the second row (first row of green), I stitched between the st and dc spaces (not sure if this makes sense) all around. It's a bit hard to explain, but you can refer to the image below to get a better idea of what I'm trying to say. You can also choose not to follow how I put the seeds there, and do what's easy for you (and make sure to share your technique in the comments below!) :)


For a more realistic kiwi look, I would suggest using a brown fuzzy yarn for the skin for a more hairy look; I remember my boyfriend asking me, "why doesn't it have hair?" when I showed him the kiwi coaster. He's passionate about kiwi. And the nutrition it brings. Did you know there's a lot of vitamin C in a single kiwi? Like, enough (or more than enough) for you daily vitamin C requirement? His kiwi passion has rub off me. And I am making fun of it again (I'm sorry! haha!).

So there you have it, kiwi coaster! Very simple. And nutritious. And helpful. Like your feedback and questions and reactions if you leave them in the comments section below ;) Anyway, as always, enjoy crocheting AF! \m/


This pattern is free and not for sale. Please credit and link back to this site when sharing, using for business, etc. Thanks! :)

Monday, July 4, 2016

Watermelon (and Grapefruit) Coaster Pattern

Last weekend, I was teaching my mom the different kinds of crochet stitches and how to read crochet patterns. My mom actually already knows the basic stitches such as chain and single crochet, but she doesn't know that they are called as such. When she was younger, she used to crochet stuff to earn extra on the side (like mother, like daughter!). She would be given a finished product, and she would copy how it's done based on its stitches. Without a pattern! How crazy is that? I mean, sure, we can copy stitches based on a finished product but imagine if the yarn used was fine, and you had to count how many stitches are in a row, and then count how many rows there are, etc. etc. So hands down to my mother and all the people out there copying a finished product's stitches. And thank you to those who "invented" crochet patterns and for all the available patterns now in the world that make my life and many people's lives a lot easier. :)

Anyway as I was saying, I was teaching my mom how to read a pattern, and I also taught her how to make a magic ring, how to change colors, how to make rounds, etc. When I finished teaching her all these, I looked for a simple pattern she can use to practice her newly-acquired pattern-reading skills. I wanted something that involved different stitches, but simple enough to finish in a few minutes. I simply googled, "basic crochet pattern" and a bunch of patterns came up, but most of them involved only using one or two types of stitches. Most of them are good but I just didn't quite find what I was looking for.

Then I remembered my watermelon coaster. Had I posted this pattern before, I would have used this to teach my mom how to read patterns. Ha ha!


Materials
Hook: 4mm crochet hook
Yarns:
Gantsilyo Guru Light Cashmere Blend Coral (pink)
Gantsilyo Guru Light Cashmere Blend White
Gantsilyo Guru Milk Cotton Light Lime (green)
Some black yarn

Note: I would recommend using the same type of yarn all throughout, but I only had these in hand so I made do with them. Also, it can be anything, really, as long as it's for a 4mm hook.


Stitches Used
ch (chain)
dc (double crochet)
sc (single crochet)
sl st (slip stitch)


Watermelon Coaster

Using pink yarn, make a magic ring.

Row 1: ch 2, 12 dc in the ring. Join with a sl st to the first dc. (12 sts)

Row 2: ch 2, 2 dc in each st around. Join with a sl st to the first dc. (24 sts)

Row 3: ch 2, *1 dc in the next st, 2 dc in the next* repeat around (12 times). Join with a sl st to the first dc. (36 sts)

Row 4: ch 1, *1 sc in the next 2 sts, 2 sc in the next* repeat around (12 times). Join with a sl st to the first sc. (48 sts)

Row 5: Switch to white yarn. ch 1, *1 sc in the next 3 sts, 2 sc in the next* repeat around (12 times). Join with a sl st to the first sc. (60 sts)

Row 6: Switch to green yarn. ch 1, *1 sc in the next 4 sts, 2 sc in the next* repeat around (12 times). Join with a sl st to the first sc (72 sts). Fasten off.

For the seeds, you can randomly sew in black yarn around the pink part. But as you can see in my coaster, they are not very random, because I have some difficulty randomizing things like these (hahaha!). So what I did here was: *sew in one seed in row 3, skip 2 sts, sew in one seed in row 2, skip 2 sts* and repeat that all around. I think this will not be exactly symmetrical, but it would make the seeds somewhat evenly spaced. Alternatively, you can also randomize, it's really up to you. :)


Question: My coaster looks like it has corners (made by the increases), instead of a perfect circular shape. Do any of you guys know how to get rid of those corners? Please do let me know in the comments section, I would love to know your suggestions!


Grapefruit Coaster

I used the same method for my grapefruit coaster, only using different colors, of course. I used Gantsilyo Guru Milk Cotton Light Old Rose, the same white yarn with my watermelon, and Gantsilyo Guru Milk Cotton (light) Sunshine. The adjustments are as follows:

In the beginning, use the Old Rose yarn until row 4.

In row 5, switch to white yarn as well.

In row 6, switch to yellow yarn.

For the division, I simply attached white yarn from one part of the white row to the center, then to the opposite side, three times to achieve six divisions.


The coaster measures up to 4 inches in diameter. The grapefruit measures bigger, because the old rose yarn I used is slightly thicker than the coral one for the watermelon. If you want to resize your coaster, you can simply add rows to increase size, and skip/remove rows to decrease size. Easy peasy. :)

For my recommendations, as I've mentioned earlier, I would prefer to use the same kind / weight / ply of yarns in all the rows, so the stitches will be even, and the size, too. But if you don't have the same kind, it's also just fine, as long as you can work them all with the same hook size. Also for the grapefruit, you can use a different shade of yellow for the outer row, maybe something paler. You can also sl st across the grapefruit to make the divisions, for a "more attached" version (because in this version I made, the white strings tend to loosen up and might get entangled, or something like that. You get it, I know (: ).

By the way if you didn't notice, I included a list of stitches used in this coaster, so you can already decide early on if this is the type of pattern you want to use, especially if you want to teach someone how to read a pattern (like I did with my mom, I had to find a pattern that uses different kinds of stitches). One time I was halfway through a project I was doing when I encountered an unfamiliar abbreviation in the pattern, and at that time I was reluctant on learning a new stitch, because I am lazy. Haha! So I think it's important to list the stitches used especially for beginners. I'm sorry I did not do this in my previous posts, but I will now from this post on.

Lastly, because I got inspired by teaching my mom how to do basic stitches, I made a page with the basic stitches here. I also plan to make a page for the different techniques I use (e.g., magic ring, changing colors, etc). I will post it once done!

That's it for this post, you know the drill - leave your questions, comments, suggestions, praises, what-have-you, in the comments section below. And as always, enjoy crocheting AF!


This pattern is free and not for sale. Please credit and link back to this site when sharing, using for business, etc. Thanks! :)

Tuesday, June 14, 2016

Lemon Coaster Pattern [UPDATED]

Hello!!

I've mentioned in my previous post that I've been making coasters these past weeks. I've finished a handful of them already, and I hope to post them in the coming days (sweet!). I made most of them using free patterns I found online, some I adjusted to fit the size I want, and some I improvised. I will be posting the coasters I made using my own pattern first, and hopefully you guys find it useful. :)

First one on the list of my improvised patterns is the lemon coaster - not a lemon slice, but the whole lemon with the pointy ends. I was making these citrus slices coaster one time - green for lime, and orange for, well, orange - and when I was about to start yellow for lemon, I thought, why not make the "un-sliced" version of these coasters too? So I tried looking for patterns for a whole lemon coaster, but all I found were hot pads (which I had difficulty adjusting to make it smaller) and lemon slices. Eventually, I decided to make my own lemon coaster pattern, which turned out to be pretty easy (I already got the right measurement and pattern by the second try!).


Refreshing!


Materials
Hook: 4mm crochet hook
Yarns:
Gantsilyo Guru Milk Cotton (light) Sunshine
Some green yarn


Lemon Coaster

Using yellow yarn, make a magic ring.

Row 1: ch2, 12 dc in the ring. Join with a sl st to the first dc. (12 sts)

Row 2: ch 2, 2 dc in each st around. Join with a sl st to first dc. (24 sts)

Row 3: ch 2, *1 dc in the next st, 2 dc in the next* repeat 12 times. Join with a sl st to first dc (36 sts).

Row 4: ch 1,
*
sc in next 2 sts, 2 sc in next,
hdc in next 2 sts, 1 hdc 1 dc in next st,
dc in next 2 sts, trc, ch 2, sl st to 2nd ch from hook, trc in same st as first trc,
dc in next 2 sts, 1 dc 1 hdc in next st
hdc in next 2 sts, 2 sc in next,
sc in next 2 sts
*
This is the first pointy end of the lemon. Now make 2 sc in next st, and repeat * to form other end. To finish, sc in the last st, and sl st to first sc. Fasten off.


Leaves (make two, or how many you like!)

I used the leaves pattern I found here. As you can see in the picture below, I deliberately made the leaves different in size - I still used the leaves pattern, but used hdc and dc for the smaller one, and htr and trc for the slightly bigger one. You can opt for this too, or you can have uniformly-sized leaves, it's up to you ;)

On the other hand, if you want you can also leave out the leaves and just stick with a plain lemon coaster, and I think that will also look and do just fine.

So after making the leaves, sew them to the lemon coaster, preferably to one of the pointy ends (I actually searched for images of lemons just to see where to put the leaves; silly me, right?). And then you're done!

Lemon coaster

The coaster measures 4 inches in diameter from one pointy end to the other, and 3 inches from the "flat" sides. If you want to make your coasters bigger, you can use trc instead of dc for the first row up to the third row, depending on how big you want it. If you use trc for all rows, I think it can size up to 4.5 to 5 inches measuring from the pointy ends. Additionally, you can also use a paler shade of yellow for a more lemony look.


[UPDATE] Sizing up the coaster

Thanks to AMJ for pointing out that using trc in the first row makes the stitches dense. :) So I came up with an alternative way to make your coaster bigger!

Instead of using trc in some/all of the rows in the coaster, you can also increase the initial stitches by 2 in your magic ring, and then cascade the increase to the succeeding rows. For example,

Row 1:   14  [16 | 18 | 20 | ...] sts
Row 2:   28  [32 | 36 | 40 | ...] sts
Row 3:   42  [48 | 54 | 60 | ...] sts

(The numbers in [] mean you can also start with 16 sts, then row 2 has 32 sts, row 3 has 48 sts. The same goes for 18 and 20. I also color-coded them for easier reading.)

And then for the 4th row, add one [2 | 3 | 4 | ...] *sc in next 2 sts, 2 sc in next st* at the beginning of the round, and one [2 | 3 | 4 | ...] *2 sc in next st, sc in next 2 sts* at the end. This is to make sure the number of stitches needed for the last row will be met (so the coaster will not curl), and also to keep the pointy ends opposite of each other.

I haven't tried this for much larger sizes, I have a feeling that the pointed ends might become less prominent as the coaster gets bigger. If you want to try it, let me know of your final results in the comments below!


[end of update]


If you guys have any questions, feel free to leave a comment below, and I'd also love to see your finished products so you can also leave them in the comments section. That's it for this post, so stay tuned for the next episode of this coaster series, and I hope you enjoy crocheting AF! \m/


This pattern is free and not for sale. Please credit and link back to this site when sharing, using for business, etc. Thanks! :)

Thursday, May 26, 2016

Ewok Scoodie Pattern

Finally! After weeks I am now able to create another blog post. I have been a bit busy lately, and with my crochet I've been doing a lot of projects - mostly coasters. I'll be posting them soon, once I finish the coaster sets I want. :)

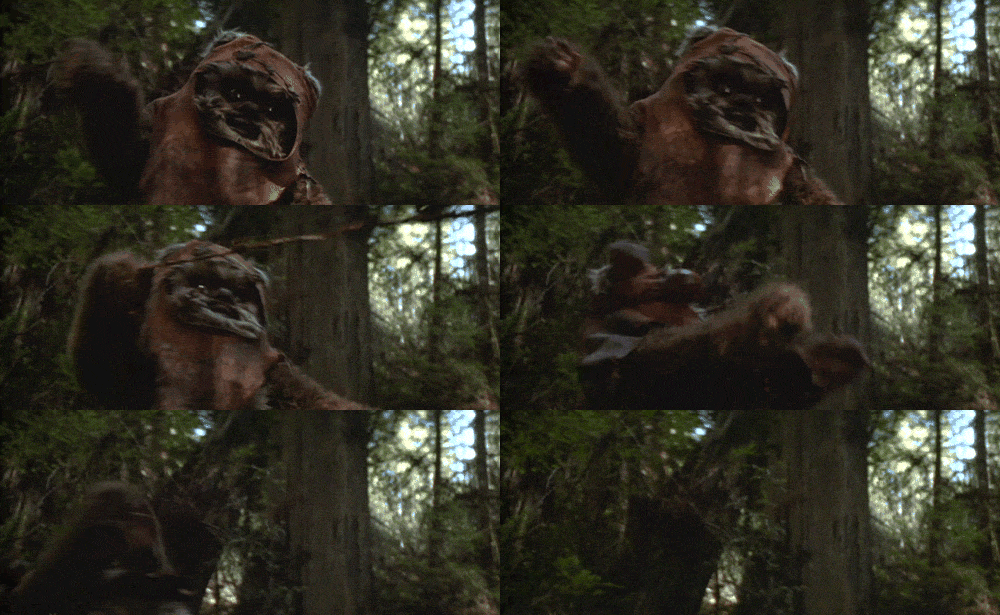
One of these projects is my first big (and I think the biggest!) project so far - my very own Ewok Scoodie! Well, it's not exactly my own Ewok scoodie as one, I got the pattern online from a very talented person and two, I really made it for my little brother.

As you might already know, I was a little bit of a braggart when I started crochet and was able to actually make something decent. I also started doing Pinterest and pinning a sh*tload of crochet projects that I wanted to do when I grow up when I gain enough crochet powers. Sooooo, one weekend while having breakfast (or lunch, or dinner; I don't really remember, I only remember being in the dining table with food!) with the family, I was showing them the crochet projects I intend to do in the future. One of them was the Ewok scoodie, because Star Wars, and I love Star Wars. Actually, my whole family loves Star Wars, so when my brother saw the scoodie he told me I had to make him that. At that time I was only doing headbands and animal appliques, so naturally I responded, "Maybe give me five years." Exaggerated, I know! But I didn't know that then (which was only a couple of months back, haha).

So while shopping for yarn during one of my yarn escapades, I spotted this carrot yarn and I thought, hey I can use this yarn for the Ewok scoodie my brother wants. And so the next thing I know, I'm double-crocheting my way into the galaxy far far away.

Here we go!!
For my version of the scoodie, I used a medium weight yarn and a 5mm hook, smaller than those in the pattern I found. Since I live in a constantly hot-weathered country, I thought a bulky scoodie would really be impractical, so I wanted the scoodie to be lighter and less bulky, and therefore cooler.

Here's the link to my Ravelry project, where you can find the yarn I used, and here's the link to the original Yub Nub scoodie pattern.

For the adjustments:

Scoodie

Row 1: Instead of doing 140 sts, I made 180. You can also add more, depending on how long you want your scoodie to be.

Row 8: I skipped 50 sts instead of 40, and then made 80 dc's instead of 60.

Row 9-11: I added 2 more rows for a total of 5 rows, to make the hood deeper/longer.

Row 12-16 (from the original pattern, disregarding the additional 2 rows I made in the previous step): I made 30 dc instead of 20, and followed the dc increases for each row (row 12 has a total of 75 sts, row 13 has 70, row 14 with 65, and so on).

And finally after the last row, I added another row: dc 29, dc2tog, dc 29.

Ears

I added one more row after row 5 while constructing the circle: *4 sc, 2scinc, repeat from * around. And then proceeded with folding it in half and doing sc edges with the lighter-colored yarn.


The final product:

Yes I have a cat face :3

Side view

I did not sew in the button as the pattern instructed because I liked it open just like this. But I might add it later on, if my brother wants it. Also I didn't have fuzzy yarn at hand so my ewok ears aren't as fuzzy as they should be, but nonetheless it still looks cute! I hope my brother likes it.

So that's it! If you have any questions about the pattern and the adjustments I made, just let me know in the comments below. :)

Enjoy crocheting AF, and may the force be with you! \m/


Yub Nub!


This pattern is free and not for sale. Please credit and link back to this site when sharing, using for business, etc. Thanks! :)

Tuesday, April 19, 2016

Animal Appliques: Pug Applique Pattern

When I started crocheting, I wanted to do simple things first like appliqués to boost my confidence as well as to practice my pattern-reading skills. Being a practical person (and a bit of a braggart among friends), I thought of making some things I can give to my friends, and at the same time practice my crochet skills. Two birds with one stone!

So what to crochet? As I was making a cat face appliqué the shape of Hello Kitty's head (which I also gave away, to my cousin), I thought maybe I can also give them something animal.

We've always had "animal nicknames" for each other, mainly because we are animal people, among other things. Friend number 1 is a pug, because she has a pug and she has a tiny nose much like that of a pug's (haha!). Friend number 2 is a duck primarily because he has ducks for pets, and also because he has a protruding bottom :D Friend number 3 is a penguin, not because she has a pet penguin (sadly!) but because she looks like Gunther from Adventure Time, and also either because she's a slow walker/waddler or she hates hot weather, or both. :)

So I decided to make some simple and cute animal appliqués for my friends, and I hope they find it funny and cute!


The pattern for the duck can be found here, and the penguin can be found here. And instead of sewing in eyes, I glued googly eyes to them :D They turned out to be cute, and I was able to save time because sewing has always been a challenge for me.

For the pug, I had quite a difficult time looking for a free pattern, and I did fail to find one so I thought of improvising my own.


Pug Applique

Materials:
Hook: 4mm crochet hook
Yarns:
Creme de la Creme Dark Linen
Creme de la Creme Brown
Other stuff:
a pair of googly eyes
glue

Base

Using the dark linen yarn, make a magic ring.

Row 1: Ch2, 6 dc in the ring, sl st with the first dc (6 st).

Row 2: Ch2, 3 dc in the first st, *2 dc in the next st* 2 times, then 3 dc in the next st, 2 dc in the rest sts. Sl st with the first dc (14 sts).

Row 3: Ch 2, 2 dc in each st all around. Sl st with the first dc. FO.

You should get a somewhat slightly oval base.

Nose/Snout

Using the brown yarn, ch 4. 2 dc in the 3rd st from the hook, then 4 dc in the next st (you should end up turning to the other side when you finish the 4th dc). 2dc in the next st, FO.

Ears

Using the brown yarn, ch 3. Hdc in the 2nd ch from the hook, ch1, sl st in the same stitch. You can FO here or keep the yarn in the hook to attach the ear to the base.

Putting them together

Choose one st in the top of the base (the slightly longer side), and sew the ear in that st using a tapestry needle, or sl st through the chosen base st if your yarn is still in your hook. Do this for the other ear - I placed mine with 9 sts between each ear.

You can either sew the nose in, or be lazy like me and just glue it to the base. Then position the eyes so that they are a bit far away from each other, similar to how it is on a pug's face. Glue them in and let it dry.

And voila! You're done with the pug face. Very easy, right?

Pug face! Measures a little less than 3 inches in length.

This was one of the first projects I did without a pattern, so I had a number of trial and errors before I was able to complete it.

If you have any questions or corrections, let me know in the comments below and I will be glad to respond.

Enjoy crocheting AF! \m/


This pattern is free and not for sale. Please credit and link back to this site when sharing, using for business, etc. Thanks! :)